
Heavy Gear Battle Report
08/06/2021
Phil Abramowitz (Black Talon) vs JJ Alexander (South)
Overview
This battle report is a playthrough of a scenario from the Heavy Gear Blitz Tournament System v 0.1 – the Prisoner Exchange scenario (randomly rolled from a set of three possible scenarios). Note that we got this game in right before v0.2 of the tournament pack dropped. This was a 100 TV Black Talon vs South game. We did not have any official truck models so we substituted in some Team Yankee APCs. One assumption we made is that the trucks containing the prisoners were unarmed – who would give an enemy prisoner a live weapon?
Forces
Black Talon
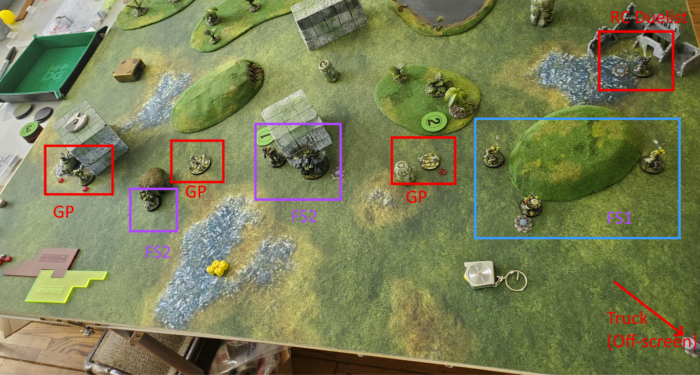
JJ and I tried something different. Although we used our standard armies, we each decided to take a duelist. I took a very shooty Vulture, which I gave Ace Gunner and Push the Envelope. The duelist was backed up by my standard Raven/Owl recon squad (alhtough I added NEW Specialist to the Raven) and a Fire Support squad made up of a Owl, Cobra (which I gave Trick Shot) and an Infantry squad.
These groups are listed to match the picture above, left to right.
| Name | TV | CG | Commander |
| Gamma Raven + EW Specialist | 16 | RC | |
| Sigma Owl | 16 | RC | X |
| Alpha Owl | 17 | FS | X |
| Dark Cobra Epsilon + Trick Shot | 19 | FS | |
| Beta Infantry Squad | 5 | FS | |
| Omega Vulture + Duelist + Ace Gunner + Push the Envelope | 27 | GP | |
| TOTAL | 100 |
The force has eleven orders – although running a duelist was very different than what I was used to! It was strange having a squad without a commander.
South
JJ Took 4 combat groups as well, including an Iguana Rapier Duelist. He also ran a GP squad and 2 FS squads.
| Name | TV | CG | Commander |
| Rapier Iguana + Duelist + Smoke | 12 | RC | |
| Black Box Iguana + Smoke | 12 | FS | |
| Recon Squad | 4 | FS | |
| Jager | 6 | FS | |
| Jager | 6 | FS | |
| Naga | 21 | FS | X |
| Jager | 6 | FS | |
| Long Fang Mamba | 12 | FS | |
| Caiman Command + Drone | 8 | GP | X |
| Sniper Squad Team | 3 | GP | |
| Infantry Squad | 4 | GP | |
| Jager | 6 | GP | |
| TOTAL | 100 |
Map Setup
We tried to use as much terrain as last time – I think we had sufficient. The terrain was fairly evenly scattered, and there were plenty of room for the trucks containing the prisoners to maneuver.
Deployment
Black Talon
I deployed all my forces in the middle and right side of my deployment zone. We each deployed the truck containing the enemy prisoner in the back right corner of our respective deployment zones. The recon was deployed to the right in hard cover, with the Fire Support and Duelist more centrally located.
South
JJ Deployed his three main combat groups intermixed in the deployment zone. The recon Duelist was deployed a bit forward on the right side. The GP squad was scattered on the left/middle, the secondfire support squad was on the left side, and the first fire support squad on the right side. Note that the first fire support squad also had an infantry squad aboard the Caiman.
Objectives
Black Talon
Still only taking 2 squad-based objectives per side, I took
- Assassinate (Naga, Caiman squad leaders)
- Wipe them out (FS squad FS1 (the smaller FS squad without the Naga))
In retrospect, I should not have split the Assasinate and WIpe Them Out objectives over the two FS squads..
South
JJs objectives were
- Wipe them out (my Fire Support squad)
- Hold (The two circular objectives on the map)
Turn 1
Turn 1 features a lot of cautious moving. The only exception was the Southern Duelist which moved up fairly far on the right edge. The Southern BB Iguana moved up a bit so that it could TD for the Naga. The Naga should some area weapons at the closely packed Black Talons in the center, and put minor damage on both the Vulture Duelist and the Cobra. However, the Black Talons retaliated by firing nearly everything at the Black Box Iguana and killed it. Both Caman Trucks double-timed up the board and almost ended up in the same relative positions. Neither of us fired/haywired the trucks so they just advanced at top speed – a common theme for this game.
Score 0-0
Turn 2
The Black Talons concentrated on their “Wipe them out” objective, with the Cobra, Alpha Owl and Vulture taking out an infantry unit and a Jager from the FS squad tied to the objective. Since the Black Box Iguana died last turn, this gave the Black Talons 2 points for completing the objective. The South played fairly conservitatively – they attempted a few TDs but the Black Talon units with their strong EW were able to Jam all attempts. However, the Southern Duelist did make it all the way down to the Black TalonFS squad, and charged the Owl doing 3 pts of damage to it. This would have a big impact on the rest of the game. Both Caimans advanced at full speed towards their own forces, without any interruptions.
Score 2-0 Black Talons

Turn 3
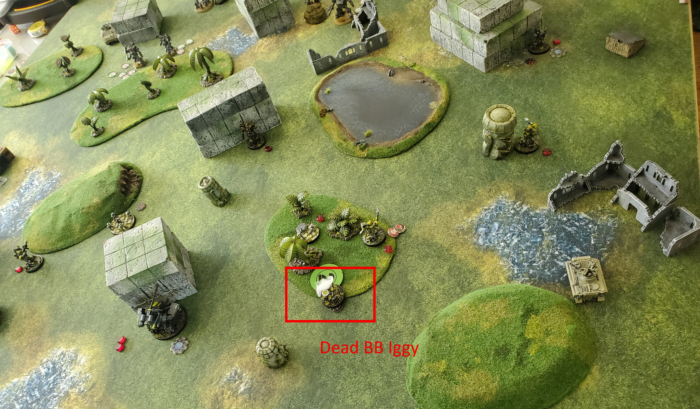
The Southern offensive begins, with mixed results. On one side, the Southern Duelist continued its rampage, finishing off the Owl. The nearby Black Talon Vulture and Cobra tried to respond, but neither was built with short-range combat in mind and they ended up retreating away from the Duelist Iguana, and were unable to damage it. The Cobra in fact ignored the Iguana and took out another Jager. On the other side, the Caiman charged ahead full to get behing the Sigma Owl and attacked it for light damage, but the Owl then retaliated, turned to face the Caiman and took it out with a combination of Bazooka and rocket fire. Killing the Caiman met an Assassinate objective for the Black Talons. Another Southern Jager managed to advance into a forest and take a rear shot into the Sigma Owl – doing light damage. The Raven reacted and did light damage back. Again, Both Caimans advanced at top speed – and both made it close to friendly troops
Score 3-0 Black Talons
Turn 4
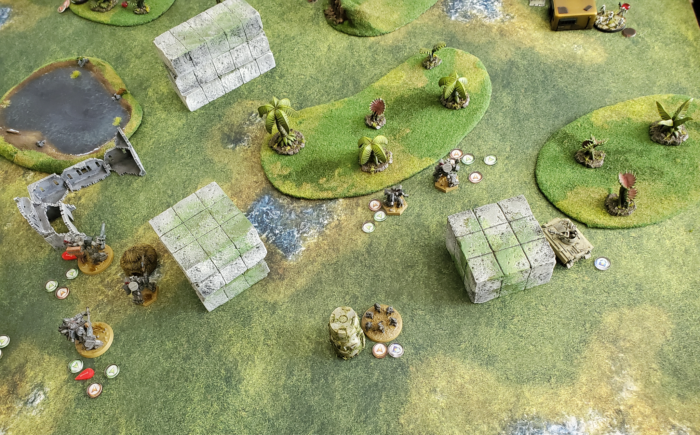
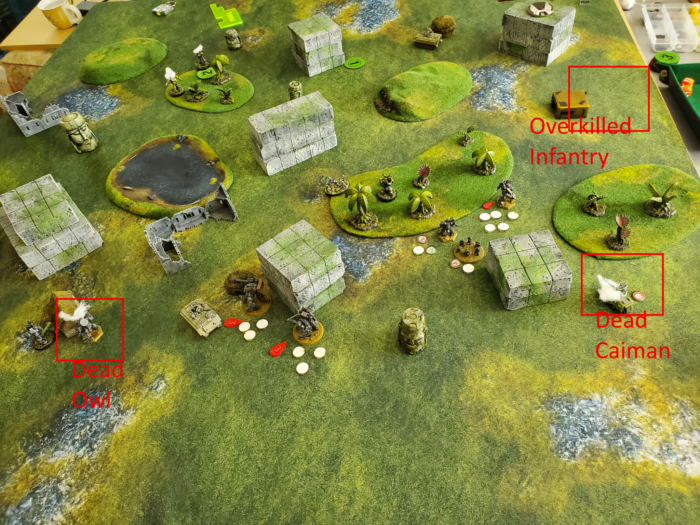
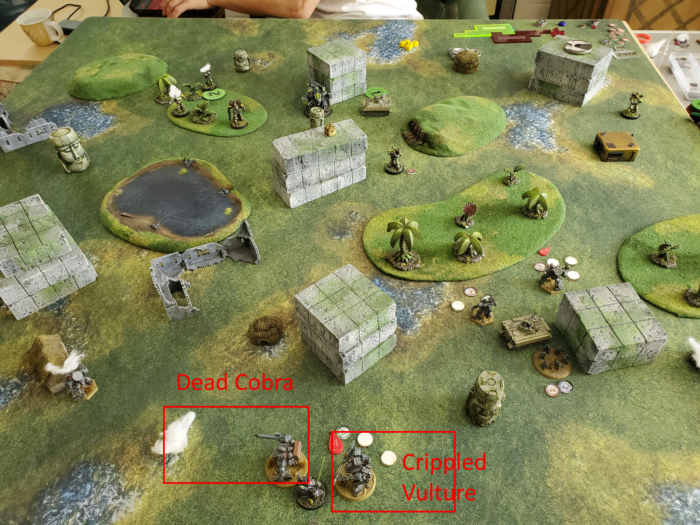
Everything fell apart for the Black Talons this turn. The Southern Naga and Long Fang Naga that had spent most of the game hiding came out to pile on the Vulture and Cobra. Since the Duelist killed the Alpha Owl, which was the only source of ECCM in the middle of the board, the Cobra and Vulture were now more susceptible to damage. The Cobra ended up dead, and the Vulture was crippled. The duelist Iguana also got into the action as well contributing to the damage on the Cobra. Killing the Cobra give the South their Wipe Them Out Objective. Both Caiman advanced within range of a friendy unit.
Final Scoring:
South: 2 Wipe Them Out objective
2 Holding 2 objectives
2 Prisoner Escaped
BTs: 2 Wipe Them Out objective
1 Assasinate
2 Prisoner Escaped
Final Score: 6-5 South
Total carnage at the end of the game:
- South lost 39% of its TV (Black Box Iggy, Caiman, 2 Jagers, Recon & Sniper Squads )
- Black Talon lost 36% of TV (Dark Cobra, Alpha Owl)
Total playing time was around 2 hours, 15 minutes.
Mission Hotwash
This was a very close game, with both sides focused on squad objectives. The MVP of the game was the Southern Iguana Duelist that managed to either kill or tie up 63 points of the Black Talons (Owl, Vulture and Cobra) as it was so much better in close combat. I’m eager to take a close combat duelist myself next game.
I probably made a mistake choosing objectives for the Black Talons – splitting up Assassinate and Wipe Them Out on two different squads. It’s always better to double up.
Thoughts on Scenario
In retrospect, my Black Talons had a hard time with this scenario as I did not feel that I had enough units to spare any of them to Haywire the enemy Caiman. As a result, the scenario just provided an additional 2 points per side, and all it did was prove that we were most likely playing it incorrectly as we did not try and impede the trucks at all. Maybe a better rule would be to not allow the Caimans to move at top speed, or maybe replace them with an infantry squad on foot with the ability to move top speed (But then again, infantry cannot be haywired)..