
Heavy Gear Battle Report
07/02/2021
Phil Abramowitz (Black Talon) vs JJ Alexander (South)
100 TV
Overview
This battle report is a playthrough of a scenario from the Heavy Gear Blitz Tournament System v 0.1 – the Coup d’Etat scenario (randomly rolled from a set of three possible scenarios). This was a 100 TV Black Talon vs South game.
Forces
Black Talon
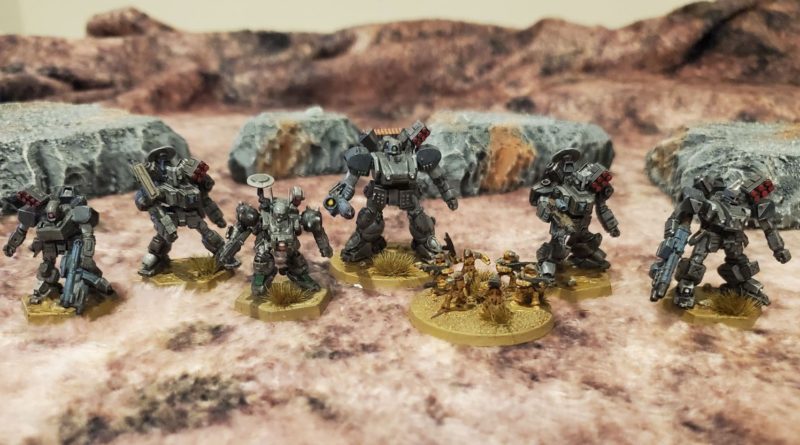
Sticking with my Black Talons after winning with it last week. I wanted to try something different though. I wanted to fit in my Eagle and Dark Cobra, since I have not yet used them. I wanted to have three combat groups, to see how viable it would be with Black Talons at 100 TV. And then I wanted a list without MATMs.
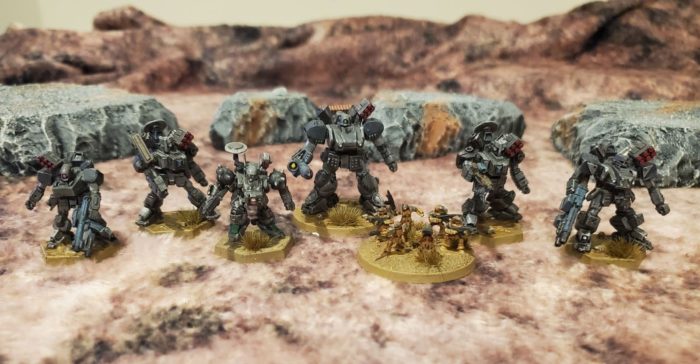
These groups are listed to match the picture above, left to right.
| Name | TV | CG | Commander |
| Gamma Raven | 15 | RC | |
| Sigma Owl | 16 | RC | X |
| Black Box Iguana (+ Veteran) | 13 | FS | |
| Dark Cobra Epsilon | 18 | FS | X |
| Beta Infantry Squad | 5 | FS | |
| Alpha Owl | 17 | GP | X |
| Beta Eagle | 16 | GP | |
| TOTAL | 100 |
The force has twelve orders – every combat group has four. It was probably a mistake to take an allied Black Box Iguana since I wasn’t planning on doing a lot of TD’s with it.
South
JJ Took 3 combat groups as well: GP and 2 FS. After facing my Black Talons last time he made sure he had longer sensor ranges to deal with my Stealth.
| Name | TV | CG | Commander |
| Black Box Iguana (+ smoke) | 12 | FS | X |
| Recon Squad Team | 3 | FS | |
| Infantry Squad | 4 | FS | |
| Jager | 6 | FS | |
| Jager | 6 | GP | X |
| Jager | 6 | GP | |
| Jager | 6 | GP | |
| Caiman Command | 7 | GP | |
| Naga (+ Drone) | 22 | FS | X |
| Elan | 3 | FS | |
| Long Fang Mamba | 12 | FS | |
| Slashing Cobra | 13 | FS | |
| TOTAL | 100 |
Map Setup
We tried to use as much terrain as last time – I think we had sufficient. The deployment for the Coup d’Etat scenario forces you to deploy in the center of the board, and we had enough so that gears were not shooting at each other immediately. A large forest in the center of the board certainly helped.
Deployment
Black Talon
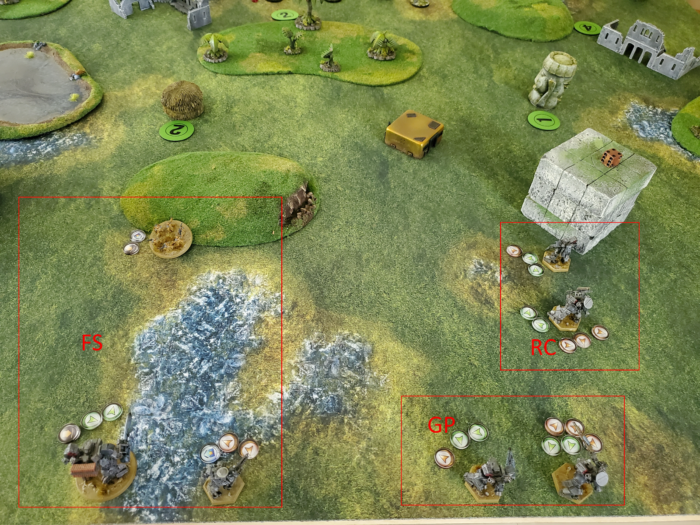
I deployed my recon squad on the right side of center behind solid cover. After the last game, I assumed the Raven would be an early target for JJ to shoot at. The Fire Support Squad was on the left side of the deployment zone. The gears were in the back to remain at range while the infantry was up close to the front of the deployment zone to stay near one of the two Hold objectives. The GP squad was in the very back on the right side. The goal was try and hold my forces back for several turns and snipe from long range, and then moving up the left and right sides toward the hold objectives where there was move cover.
South
JJ Deployed his three combat groups intermixed in the deployment zone. The light Jagers and infantry were mostly in front, with the heavier stuff hiding in back or behind cover (most likely fearing long ranged attacks that were target-designated).
Objectives
Black Talon
Unable to take my normal Assassinate because of the mission objectives, I took:
- Hold
- Wipe them out (FS squad FS1 (the smaller FS squad)).
South
JJs objectives were a mirror image, as he took:
- Wipe them out (my Fire Support squad)
- Hold
Turn 1
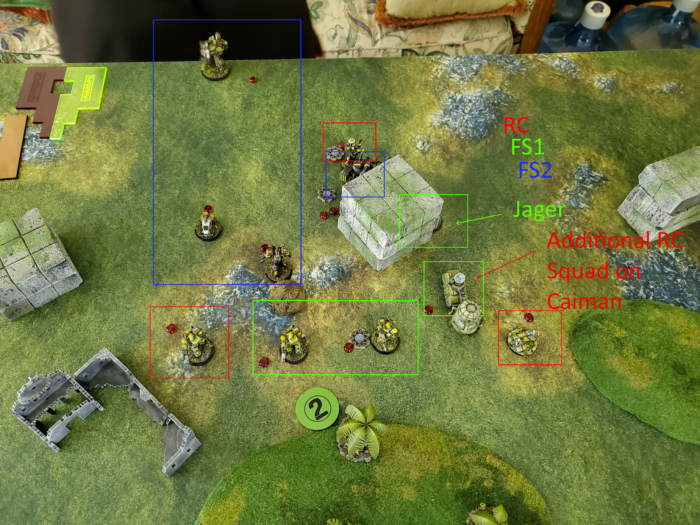
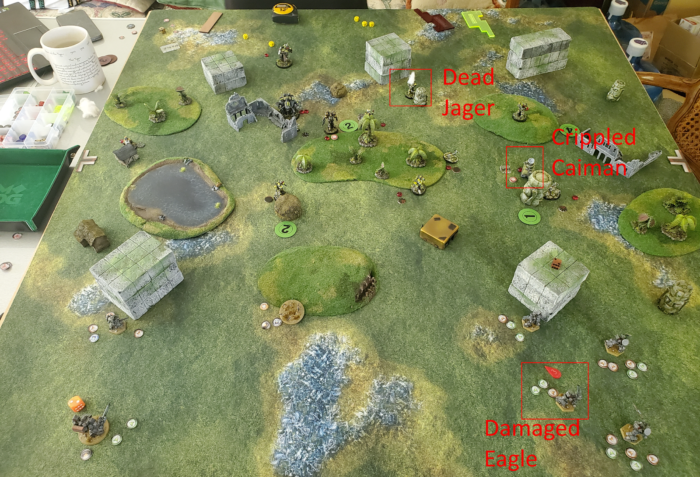
JJs goal was to swarm my Black Talons to try and counteract my stealth and long-range TD attacks. His forward line of Jagers pushed forward to my hold objectives. His Caiman also dropped infantry near the right hold objective. My Black Talons dropped back to cover positions, but they shot well. I killed the Jager in command of the GP squad, and crippled the Caiman. Meanwhile the South did three points of damage on my Eagle.
Score 0-0
Turn 2
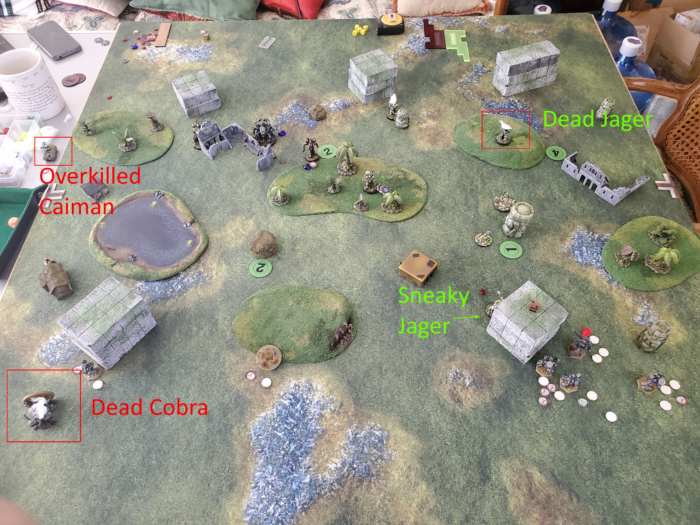
The South pressed their attack, and called in a TD attack on the Dark Cobra. The Long Fang Mamba and Naga fired 3 MATMs at the Cobra, killing it. This gave the South two VPs for executing a “Wipe Them Out” on a FS squad. The Black Talon left flank was effectively destroyed at this point. On the right side, the Black Talons performed better – killing a Jager guarding a hold objective and overkilling the Caiman.
Score 2-0 South
Turn 3
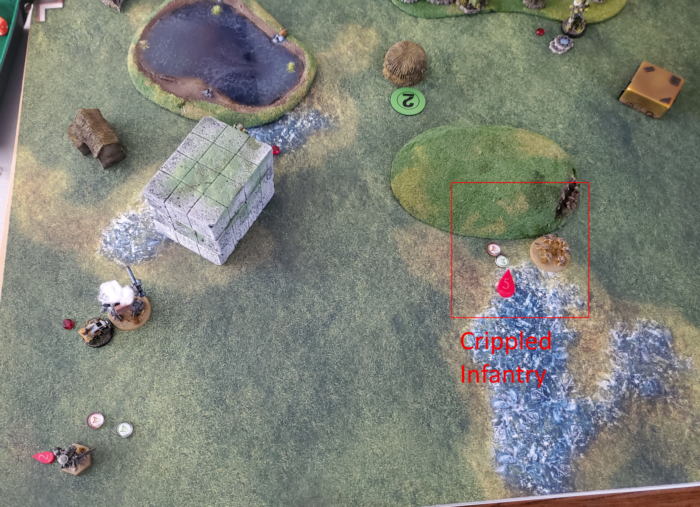
Not a good turn to be an infantryman. I won initiative, and the Black Talon goal for the turn was to start clearing off units from hold objectives. I overkilled one of the two Black Talon infantry squads, and killed the Southern Jager trying to sneak around the terrain block covering my forces on the right flank. This was enough, however, for the Black Talons to achieve their “Wipe Them Out” objective on the Southern FS squad. The Southern units mostly tried to hide in the forest (and the Southern Long Fang Mamba popped smoke) but did manage to cripple my infantry squad.
Score 2-2

Turn 4
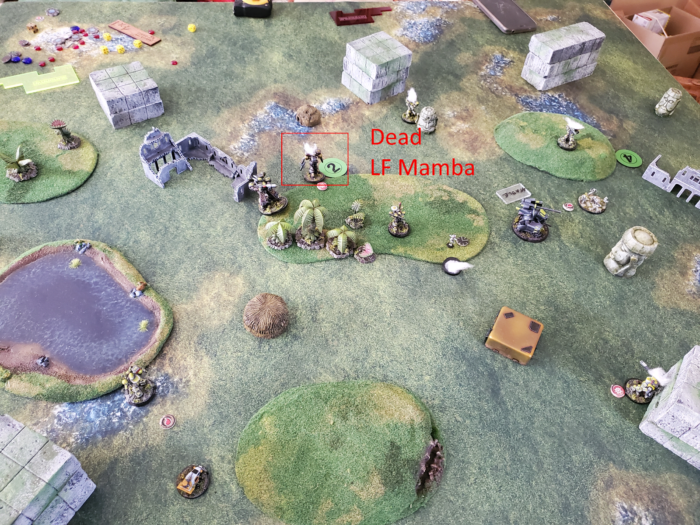
I won the initiative again, and went hunting the last infantry squad. The Black Talons managed to cripple it and reduce it to 1 health, but it was able to retreat towards a Southern hold objective. The Black Talons then managed to kill the Long Fang Mamba. This gave the Talons two VPs for achieving a “Wipe Them Out” of the FS squad (The Mamba and dead infantry comprised half the squad). The South then rushed my hold objectives – planting a Jager on one and a Naga near rough to the other to contest.
Both sides lost one commander (Dark Cobra for Black Talons, Jager for the South).
Final Scoring:
South: 2 Wipe Them Out objective
2 Holding 2 objectives
1 Kill same number of commanders
BTs: 2 Wipe Them Out objective
1 Destroying more TV
1 Kill same number of commanders
Final Score: 5-4 South
Total carnage at the end of the game:
- South lost 40% of its TV (3 Jagers, LF Mamba, Recon Infantry, Caiman)
- Black Talon lost 18% of TV (Dark Cobra)
Total playing time was around 2 hours, 45 minutes.
Mission Hotwash
This was our closest game yet. Even though the South lost over twice as much TV as the South, their aggressive attacks allowed them to hold their objectives while denying the Black Talons their own hold objectives. It was a lesson in playing the objectives, no matter what the cost in TV. Bringing an allied Black Box Iguana seemed like a waste in retrospect – having only one action meant it stood out among the Talon gears, and having two long-range sensing gears might have been too much in a 100 point list. Replacing it with a Dark Mamba for the same points might have been a better choice.
Thoughts on Scenario
This scenario was extremely tense. I really liked the shape of the deployment zones – they funnel the initial action to the center of the board and forced us both to deploy our commanders sufficiently behind our other units. Normally we’ve both been taking assassinate lately as an objective – and this added a new wrinkle with a 3-point swing in VP for killing the most commanders. After I killed a commander turn 1, JJ had to respond immediately to kill one himself, and I probably should have worked better at hiding my commanders after I killed one early. The game went down to the last turn – and could have gone either way (If I had killed his other infantry unit I would have denied JJ a hold objective VP).
This mission requires survivable commanders. I wonder if I would have been better off with two combat groups instead of three – reducing the number of commander targets for my opponent. I might try this next time…