Area of Effect Weapons
There are lots of things in the 62nd century that go boom. Heavy Gear Blitz gives us missile swarms, air burst munitions, and good old fashioned hand grenades, all of which hit a wide area and use the AE (area of effect) trait. What kinds of AE are available, how does it work, and how do you use it best? Read on
Basics of AE
Let’s try to demystify them together. Weapons that have AE effects will have an AE: X Trait, which means they have the potential to blanket a circular area X inches in radius in shrapnel or some other unpleasantness! For example, a Light Rocket Pack (LRP) has the AE: 3 trait, which means it generates a barrage of rockets that blankets an area 3 inches in radius in hot rocket-y death.
Area of Effect (AE) weapons can be the cause for some confusion in Heavy Gear Blitz!. Let’s start by talking about what is true all the time:
- Determining Cover – Cover is always calculated from the perspective of either the model firing the weapon or from the model executing a Forward Observe action, whichever is more advantageous for the attacker.
- Determining Arc/Elevation – Arc and elevation bonuses are also determined from the perspective of the firing model or the model executing a Forward Observe action, again favoring the attacker.
Just to make it clear, there are some silly situations that can arise from this.

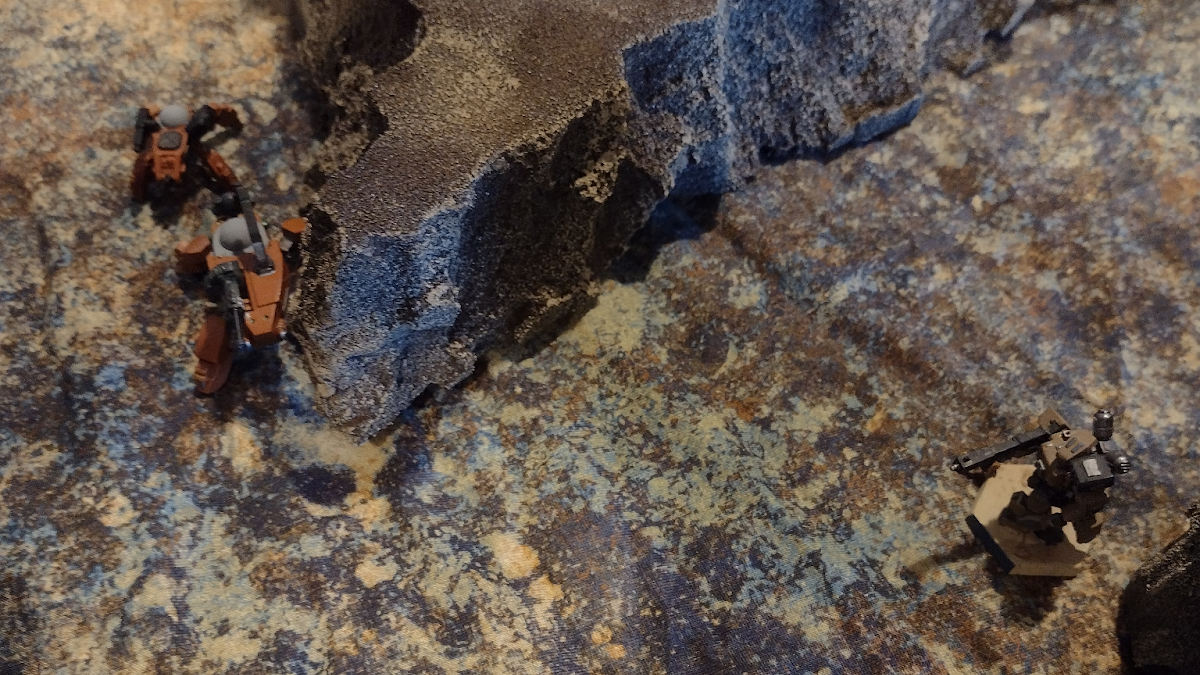
The Crusader IV has its back to some terrain, and is in full cover from the Chevalier Hammer on the other side of the boxes. The Crusader IV does not have cover from the Jerboa in the foreground though, so if the Jerboa executes a Forward Observation action, nominating the Chevalier to be part of the Fire Mission, the Crusader will not get cover bonuses.
Furthermore, since the Chevalier is behind the Crusader, it will get a rear arc bonus of +1d6. If either the Chevalier or Jerboa were physically higher than the Crusader, the Chevalier would also get a -1 TN elevation bonus to its Gunnery for the attack. Note that if the Crusader were facing towards the boxes, the Chevalier would still get a +1d6 rear arc bonus, as the Jerboa is still behind the Crusader.
- Primary Versus Secondary Targets – You must nominate either a model or a point on the ground as the Primary Target of an AE attack. Anything within X inches of the Primary Target has the potential to be a Secondary Target. Attacks against a secondary target always suffer a -1d6.
- Always Measure from a Point – If you select a model as your primary target, you measure X inches from the center point of the model’s base, not from the edge of the base. In other words, you don’t get to increase the explosion radius by half the base width!
- Indiscriminate Death – Unlike other games, friendly models caught in the X inch bubble also get attacked! High explosives do not discriminate!
You may be asking: “Why would I ever attack a point on the table?” Well, if you’re firing an AE:3 LRP at two models 4” away from one another, if you choose one of the models as a primary target, you’ll miss the other one, as it’s too far away. However, if you choose a point 2” from each model, i.e. the point directly between them, you’ll hit both as they’re now both in the AE:3 radius!
The Primary Target of the AE gets rolled at with all the usual bonuses and penalties the attack would take. If you select a point as the primary target as opposed to a model, there’s no need to roll against the ground, you auto-hit. Just roll for the secondary targets with an additional -1d6. Remember that each attack against a secondary target is resolved as an independant attack, so keep on rolling!
Examples of AE Attacks
The Caprice Mounts here are behind full heavy cover. Normally the Hunter couldn’t see them to attack them as it does not have LoS for a direct attack and cannot achieve sensor lock for indirect attacks through heavy cover. However, it can attack the ground with its rocket pod to catch the enemy in the blast, potentially doing some damage.
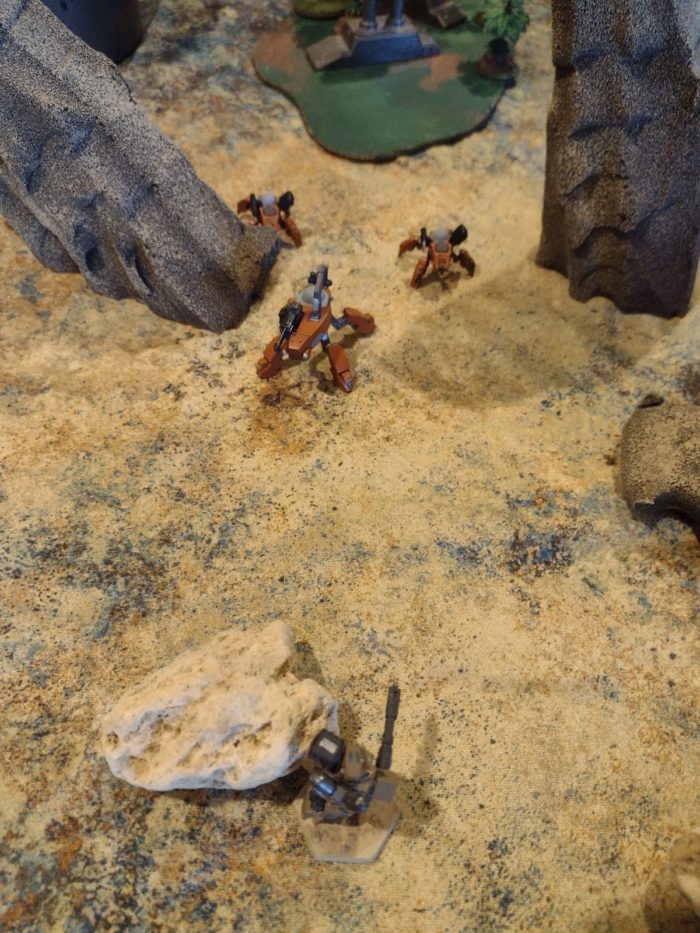
These three enemies are all close enough to be hit by the same AE if the Hunter targets the ground. While it will only be a 1d6 attack on each of them, it still forces the opponent to make a roll they could fail. This is especially valuable with high damage AoE weapons where one bad roll can do a lot of damage, or for clearing up multiple crippled models. With enough bonuses from braced, linked, focus, etc. you can achieve 2d6 or higher attacks on secondary targets!
Cover and AE
Let’s take a look at the easy case, the Direct attack case. Remember, cover is determined from the perspective of the firing or observing model. All Fire Mission attacks are considered Indirect, so for the Direct attacks we only need to look at the cover between the firing and target model.
After selecting your Primary Target, evaluate the cover between the firing model and all models within X inches of the Primary Target. If a secondary target has Medium Full Cover or Heavy Full Cover from the perspective of the firing model, it will not be affected by the attack. You can’t shoot through a solid wall. If a potential target is within X and only has Partial Cover or Light Full Cover, it will be a valid Secondary Target and you can resolve an attack against it, granting a +1d6 partial cover bonus to the defensive piloting roll.
Now to confuse everyone. If the attack is Indirect, Full Cover no longer grants invulnerability to AE attacks. You must have Full Overhanging Cover to be protected from an Indirect AE attack. Overhanging Cover is things like full cover from overhanging cliffs or bridges, area terrain higher than the model (say a 4” tall extremely dense forest considered medium cover), or being inside a building with a roof.
Indirect attacks take an additional -1d6 to the attacker’s roll to represent the firing model shooting rockets (or whatever) at a steep upwards angle so they fall from the sky instead of tracing a gentle curve from the attacking model to the target. Since the rockets are falling from the sky they can land on the other side of a wall, damaging models there.

Let’s restate this, just for clarity. Some hypothetical firing model (in red) can see model 1. Around the corner is model 2, which has full cover from our firing model. Let’s also say that models 1, 2 and 3 are close enough for 2 to be AE radius of 1. If our firing model declared a Direct attack on model 1, even though model 2 is within AE radius, it would not be hit by the Area of Effect attack. However, if the firing model instead declared an Indirect attack with the same weapon at the same Primary Target, the attack would now hit both model 1 and 2. The firing model is arcing the trajectory of whaver it’s shooting to plunge down on both model 1 and 1. In both cases, model 3 will be hit as it is visible to the firing model and in the AE radius.
Now, remember that you can fire directly through light cover, as long as you have sensor lock to your primary target. In this case, so long as all models are behind light cover, and you have sensor lock to model 1, i.e. your primary target, you will hit models 1, 2, and 3, regardless of direct or indirect fire. This is true even if models 2 and 3 are not in sensor range.

It’s also important to be sure when your bonuses apply to attacks! Some only apply to the Primary Target–in particular the bonuses from Forward Observe and Guided/TD. An Airburst Missile attack with the Forward Observe and Guided/TD bonuses would be on 2d6 base, +1d6 for Forward Observe, +1d6 for Guided/TD, -1d6 for indirect for a total of 3d6 against the Primary Target.
You’d think that the Secondary Targets would be on 2d6 then, as they suffer a -1d6 penalty, but you’d be wrong. Instead, you have 2d6 base, -1d6 for indirect, -1d6 for secondary. This is 0d6, but you can’t ever roll less than 1d6, so you’re on 1d6 for secondary targets. It is possible to generate more than 1d6 against Secondary Targets, but you either have to fire directly with some bonuses, have a linked weapon, or have arc bonuses.
Blast
Blast is a rule sometimes found on AE weapons. Most AE weapons are things like rocket swarms with multiple munitions impacting over an area. Blast weapons represent a single munition exploding and covering a large area in concussive force and/or shrapnel. In Direct fire mode, Blast weapons behave as all other AE weapons do–they do not ignore full cover.

However, when you fire them Indirect (and ONLY indirect) you get to ignore the Partial Cover bonus, as calculated from either the firing or observing model. You do not get to ignore the Full Cover bonus, as you’re not saturating an area with multiple munitions. There’s only one thing exploding, and a wall or other terrain feature can protect some secondary targets from the explosion.
In the case where you are firing through total light cover, as in the graphic below, you must have sensor lock to the primary target (model 1), as in the non-blast case. Since model 1 has full cover, you may not strip cover bonuses due to blast only negating partial cover in indirect mode.

As far as when to use this property of blast weapons, you have to think about how this affects the roll. It will mean you are taking a -1d6 penalty to deny your opponent a +1d6 bonus. This means it is best to use this when you are dealing with an enemy that has a high PI skill and gets more from each dice, when shooting a crippled or otherwise penalized enemy (to make their roll even worse), or when you can offset the penalty with your own bonuses like Braced.